第九章:加载纹理
jME3 支持下面4种纹理:
- Texture2D:最常用的纹理,其实就是一张2D位图;
- Texture3D:一组
Texture2D对象,常用于体渲染; - TextureCubeMap:由前、后、左、右、上、下共6个Texture2D组成,通常用于表示天空盒;
- TextureArray:OpenGL 3.0 以后的新技术,将一组Texture2D对象一次提交给GPU,可用于加速地形渲染等需要多个纹理的场景。
这些纹理都可以使用 com.jme3.texture.Texture 对象表示。
如果你对“纹理”这个词不太了解,请查阅 Opengl中文教程:纹理。
演示代码
下例演示了如何加载纹理:
Texture texture = assetManager.loadTexture("Textures/Monkey/DiffuseMap.png");
纹理加载后,要作为材质参数设置给 Material 对象,并应用到 Geometry 上才能够显示。
// 加载纹理
Texture texture = assetManager.loadTexture("Textures/Monkey/DiffuseMap.png");

// 设置为Unshaded材质的 ColorMap 参数
Material mat = new Material(assetManager, "Common/MatDefs/Misc/Unshaded.j3md");
mat.setTexture("ColorMap", texture);

// 将材质应用到 Geometry 上
Geometry geom = new Geometry("Quad", new Quad(1, 1) );
geom.setMaterial(mat);
rootNode.attachChild(geom);
TextureKey
除了使用路径直接加载纹理,还可以使用 TextureKey 和 loadAsset 方法来加载。
TextureKey texKey = new TextureKey("Textures/Monkey/DiffuseMap.png");
Texture texture = assetManager.loadAsset(texKey);
TextureKey的作用很多,包括管理纹理缓存、翻转图像、生成MipMap等。
缓存
通过调用 assetManager.deleteFromCache(texKey); 方法,可以释放纹理缓存,等待GC回收。
assetManager.deleteFromCache(texKey);
翻转纹理
为了兼容D3D和OpenGL的纹理坐标系,可能需要把纹理上下翻转。jME3加载纹理时,默认是上下翻转的。
你可以在 Texture 类的构造方法中传入一个 boolean 变量控制翻转方式。
// 不翻转
TextureKey texKey = new TextureKey("Textures/Examples/yan.png", false);
Texture texture = assetManager.loadAsset(texKey);
也可以直接调用 setFlipY(boolean flipY) 方法来控制翻转方式。
TextureKey texKey = new TextureKey("Textures/Examples/yan.png");
texKey.setFlipY(false);// 不翻转
Texture texture = assetManager.loadAsset(texKey);
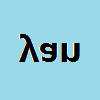
setFlipY(true) :

setFlipY(false) :

多级纹理映射
jME3可以为纹理自动生成MipMap,这将提高渲染远处物体时的效率和质量,但会额外增加1/3的纹理内存开销。
开启这个功能,需要在加载纹理之前调用 TextureKey 的 setGenerateMips(true) 方法。
TextureKey texKey = new TextureKey("Textures/Examples/yan.png");
texKey.setGenerateMips(true);// 生成MipMap
Texture texture = assetManager.loadAsset(texKey);
各项异性滤波
一般端游都会把各向异性滤波(Anisotropic Filtering)参数设置为 4/8/16,这会提高从不同角度渲染远处物体的质量,但FPS可能降低10~40帧左右。jME3 默认不开启各项异性滤波,即 anisotropy = 0。
开启这个功能,需要在加载纹理之前调用 TextureKey 的 setAnisotropy(int anisotropy) 方法。
TextureKey texKey = new TextureKey("Textures/Examples/yan.png");
texKey.setAnisotropy(4);// 开启各项异性
Texture texture = assetManager.loadAsset(texKey);
纹理环绕方式
纹理坐标的范围通常是从(0, 0)到(1, 1),那如果纹理坐标的值在这个范围之外会发生什么?OpenGL默认的行为是重复这个纹理图像(我们基本上忽略浮点纹理坐标的整数部分),但OpenGL提供了更多的选择:
| jME3 | OpenGL | 描述 |
|---|---|---|
| WrapMode.Repeat | GL_REPEAT | 对纹理的默认行为。重复纹理图像。 |
| WrapMode.MirroredRepeat | GL_MIRRORED_REPEAT | 和Repeat一样,但每次重复图片是镜像放置的。 |
| WrapMode.EdgeClamp | GL_CLAMP_TO_EDGE | 纹理坐标会被约束在0到1之间,超出的部分会重复纹理坐标的边缘,产生一种边缘被拉伸的效果。 |
注:还有很多OpenGL 3.0版本以前的围绕方式,新的显卡已经不建议使用,故没有全部列出。
在加载纹理后,通过调用 Texture 的 setWrap(WrapMode mode) 方法可以设置纹理包围模式。
Texture texture = assetManager.loadTexture("Textures/Examples/yan.png");
texture.setWrap(WrapMode.Repeat);
下图是分别设置为 Repeat、MirroredRepeat、EdgeClamp 模式后的纹理。

由于纹理坐标系有S、T两个坐标轴,因此可以 调用 setWrap(WrapAxis axis, WrapMode mode) 方法来为纹理分别设置不同方向的纹理包围方式。
Texture texture = assetManager.loadTexture("Textures/Examples/yan.png");
texture.setWrap(WrapAxis.S, WrapMode.Repeat);
texture.setWrap(WrapAxis.T, WarpMode.MirroredRepeat);
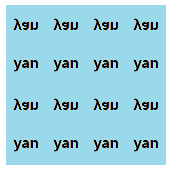
横(S)轴采用复制模式,竖(T)轴采用镜像复制模式,效果如下:

对于 Texture3D 来说,除了ST坐标轴外,还有“深度”坐标轴,可以通过 WarpAxis.R 来指定。
Texture3D texture = (Texture3D)assetManager.loadTexture("Textures/Noise/Noise3D.dds");
texture.setWrap(WrapAxis.S, WrapMode.Repeat);
texture.setWrap(WrapAxis.T, WrapMode.Repeat);
texture.setWrap(WrapAxis.R, WrapMode.Repeat);
纹理滤波
放大滤波
当物体很大但纹理分辨率很低时,将启用放大滤波(MagFilter)。jME3 支持 OpenGL 的最邻近滤波(GL_NEAREST)和二次线性滤波(GL_LINEAR),前者会渲染出像素风格的画面,而后者会显得比较模糊。
| jME3 | OpenGL | 描述 |
|---|---|---|
| MagFilter.Nearest | GL_NEAREST | 选择中心点最接近纹理坐标的那个像素,看起来会有像素风格。 |
| MagFilter.Bilinear | GL_LINEAR | 基于纹理坐标附近的纹理像素,计算出一个插值,近似出这些纹理像素之间的颜色。 |
通过调用 Texture 的 setMagFilter(MagFilter filter) 方法可以设置放大滤波方式,代码如下。
Texture texture = assetManager.loadTexture("Textures/Examples/yan.png");
texture.setMagFilter(MagFilter.Nearest);// 采用最邻近滤波
下图是分别使用 Nearest 和 Bilinear 滤波的效果:

缩小滤波
若物体在画面上看起来只有几个像素大小,使用 2K 分辨率的纹理是毫无意义的。当物体很小但纹理分辨率很高时,将启用缩小滤波(MinFilter)。缩小滤波通常和多级渐远纹理(MipMap) 一起使用。
jME3 支持 OpenGL 的最邻近滤波和线性滤波,这两种滤波方式和 MipMap 又额外搭配出 4 种组合。
| jME3 | OpenGL | 描述 |
|---|---|---|
| MinFilter.NearestNoMipMaps | GL_NEAREST | 最近邻滤波 |
| MinFilter.BilinearNoMipMaps | GL_LINEAR | 二次线性滤波 |
| MinFilter.NearestNearestMipMap | GL_NEAREST_MIPMAP_NEAREST | 使用最邻近MIPMAP的最近邻滤波 |
| MinFilter.BilinearNearestMipMap | GL_LINEAR_MIPMAP_NEAREST | 使用最邻近MIPMAP的二次线性滤波 |
| MinFilter.NearestLinearMipMap | GL_NEAREST_MIPMAP_LINEAR | 使用MIPMAP级别之间线性插值的最近邻滤波 |
| MinFilter.Trilinear | GL_LINEAR_MIPMAP_LINEAR | 三次线性滤波(使用MIPMAP级别之间线性插值的二次线性滤波) |
注意:如果使用后4种滤波方式,应该先用 TextureKey 设置生成 MipMap。
通过调用 Texture 的 setMinFilter(MinFilter filter) 方法可以设置缩小滤波方式,代码如下。
TextureKey texKey = new TextureKey("Textures/Examples/yan.png");
texKey.setGenerateMips(true);
Texture texture = assetManager.loadTexture(texKey);
texture.setMinFilter(MinFilter.BilinearNearestMipMap);// 采用最邻近MIPMAP的二次线性滤波
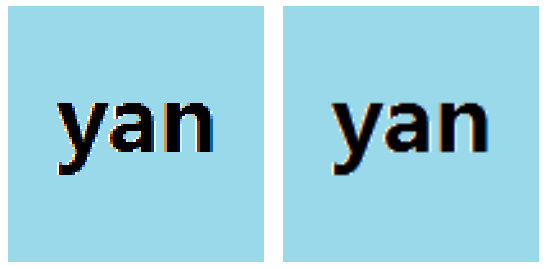
下图是分别关闭和开启 BilinearNearestMipMap 滤波的效果:
